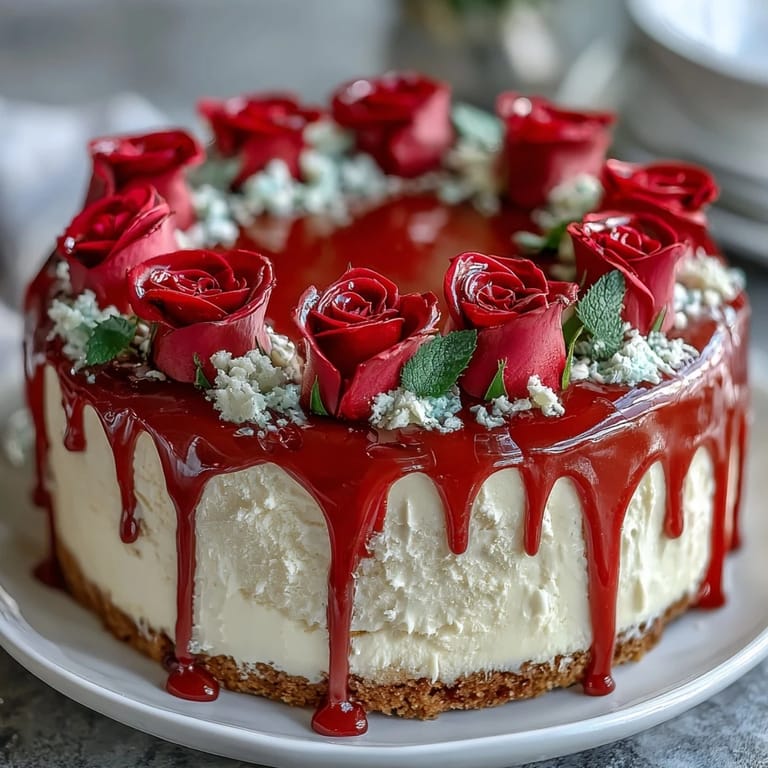
 Pin it
 My cousin called me three weeks before her graduation, voice trembling with excitement and panic in equal measure. She wanted something beautiful for the celebration dinner, something that would make everyone stop mid-conversation and just stare. That's when I thought of this sheet cake—soft, vanilla-forward, and dressed up with buttercream roses that look like you spent hours perfecting them (even though you didn't). The first time I piped those roses, my hand shook so badly I made lopsided blobs, but somehow they became the most charming part of the whole thing.
I'll never forget watching my aunt's face when she saw the finished cake sitting on the dessert table—she stood there for a full minute without saying anything, just smiling. My cousin cut into it, and the way the layers revealed themselves, golden and perfectly crumbed, made everyone lean in. That's when I realized this recipe isn't just about feeding people; it's about creating a moment they'll mention next summer when they're reminiscing about the celebration.
Ingredients
- All-purpose flour: The foundation of everything; measure by spooning and leveling rather than scooping straight from the bag, which compacts it and can make the cake dense.
- Baking powder and baking soda: This combo gives you a tender crumb and a slight vanilla cake flavor that doesn't need chocolate to shine.
- Unsalted butter: Room temperature is non-negotiable here—cold butter won't cream properly, and you'll end up with a gritty texture instead of fluffy.
- Granulated sugar: Creaming it with butter for those extra minutes creates tiny air pockets that make the cake lift.
- Eggs: Also at room temperature; cold eggs won't incorporate smoothly and can cause the batter to break.
- Vanilla extract: Real vanilla makes a difference you can taste, especially since this recipe keeps other flavors simple.
- Whole milk: The fat content keeps things tender and rich-tasting without being heavy.
- Powdered sugar for buttercream: Sifting it before mixing prevents lumps that resist beating and create a grainy frosting.
- Food coloring: Gel is the secret weapon—it won't thin out your buttercream the way liquid coloring does, so your roses stay structured and vibrant.
Tired of Takeout? 🥡
Get 10 meals you can make faster than delivery arrives. Seriously.
One email. No spam. Unsubscribe anytime.
Instructions
- Prepare your pan and oven:
- Preheat to 350°F and line that 12x18-inch pan with parchment paper—greasing it first keeps the parchment from sliding around while you're pouring batter. This size bakes evenly and gives you the perfect height for a show-stopping cake.
- Combine your dry ingredients:
- Whisk flour, baking powder, baking soda, and salt in a medium bowl so everything distributes evenly throughout the batter. This step prevents pockets of baking soda that would taste metallic.
- Cream butter and sugar:
- Beat them together for a full 3-4 minutes until the mixture looks pale and fluffy, almost like frosting itself. You're whipping air into the butter, which becomes the lift in your cake.
- Add eggs one at a time:
- Wait until each egg is fully incorporated before adding the next; this helps them emulsify properly and keeps the batter smooth. Mix in vanilla after the last egg.
- Alternate wet and dry ingredients:
- Start with flour, then add milk, then flour again—this creates a stable emulsion that won't curdle or separate. Mix just until you don't see streaks of flour; overmixing toughens the crumb.
- Bake with patience:
- Spread batter into the prepared pan and smooth the top gently with an offset spatula. Bake 30-35 minutes until a toothpick in the center comes out clean or with a few moist crumbs clinging to it.
- Cool completely:
- Leave the cake in the pan on a wire rack until it's completely cool to the touch—this prevents the frosting from melting into puddles. I usually let mine sit for at least two hours, or even overnight.
- Beat buttercream to fluffy perfection:
- Cream butter first until it's pale, then gradually add sifted powdered sugar so lumps don't hide in the frosting. Add milk and vanilla, then beat for a full 5 minutes until it's cloud-like and spreadable.
- Tint your colors:
- Divide buttercream into bowls and add gel coloring drop by drop, mixing between each addition to avoid over-coloring. Start lighter than you think you want—you can always add more.
- Spread the base layer:
- Apply a thin, even layer of white buttercream across the entire cooled cake using an offset spatula—this seals in crumbs and gives your roses a smooth foundation to sit on.
- Pipe your roses:
- Fit piping bags with petal tips and pipe roses by starting in the center and spiraling outward, rotating the bag as you go. Add green leaves between roses using a leaf tip for dimension.
- Add your message:
- Switch to a small round tip and pipe a congratulations message or the graduate's name wherever feels balanced. Practice the lettering on parchment paper first if you're nervous.
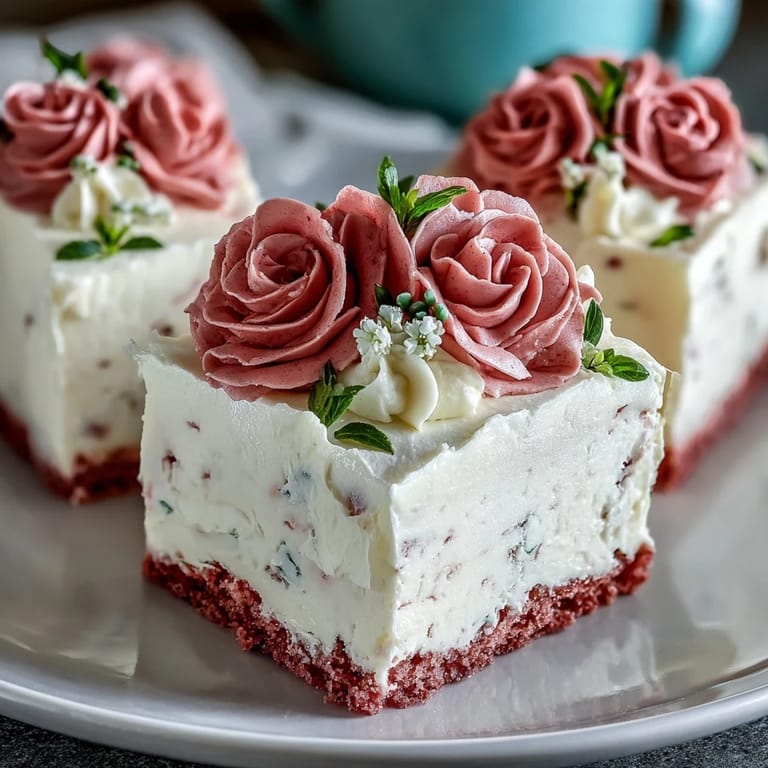
 Pin it
 The most beautiful part of decorating this cake wasn't the piping—it was watching my cousin's friend offer to help, even though she'd never piped a rose in her life. By the end, she'd made five, and they weren't perfect, but they were hers, and that made them special. Food has this way of bringing people together even before you eat it.
Why This Cake Works for Celebrations
Sheet cakes are the unsung heroes of party desserts because they feed a crowd without requiring you to balance three layers or construct architectural marvels. This particular version stays moist for days, which means you can bake it the day before your celebration and spend your energy on decorating instead. The vanilla flavor is classic enough that it pairs with anything—coffee, champagne, fresh berries—but the buttercream roses make it feel completely intentional and elegant.
The Art of Piping Roses
Piping roses intimidated me for years until I realized they don't need to look like florist roses to be stunning. Each one can be slightly different, slightly lopsided even, and it somehow makes the cake look more handmade and personal. The key is not overthinking it—hold the piping bag at a 45-degree angle, let your wrist do the work rather than your fingers, and pipe from the center outward in a spiral.
Storage and Make-Ahead Strategies
This cake actually improves slightly after a day because the flavors meld and the crumb sets into that perfect tender texture. Store it covered at room temperature if you're serving it within two days, or refrigerate it for up to five days—the buttercream holds up beautifully in the cold. If you're decorating ahead, apply the roses no more than 24 hours before serving so they stay vibrant and structurally sound.
- Bake the cake layers the day before and frost them the morning of your celebration for maximum freshness.
- Keep the decorated cake in a cool room away from direct sunlight so the buttercream colors stay true and don't melt.
- If traveling with the cake, transport it in a flat container and keep it out of direct heat to avoid frosting damage.
 Pin it
 This sheet cake has a way of becoming the memory rather than just part of it. You'll remember how it looked, how it tasted, and mostly how it made someone feel celebrated on their special day.
Recipe FAQs
- → How do I ensure the cake stays moist?
Be careful not to overbake. Use room temperature ingredients and avoid overmixing the batter for a tender crumb.
- → What’s the best way to pipe buttercream roses?
Use a petal piping tip, start from the center, and rotate your hand while slowly squeezing out the buttercream to form petals.
- → Can I prepare the buttercream ahead of time?
Yes, buttercream can be made in advance and stored refrigerated. Bring to room temperature and rewhip before piping.
- → What colorings work best for vibrant decorations?
Gel-based food colorings provide bright, vivid colors without thinning the buttercream.
- → How should leftovers be stored?
Cover the cake at room temperature for up to 2 days or refrigerate for up to 5 days to maintain freshness.